I'm implementing a Java Spring Framework server that sends Apple Push Notifications to an iPhone using Swift. Here are the things you will need:
1. Account Setup
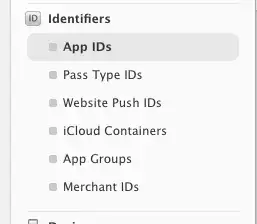
Assuming you already have an Apple developer account with certificates, log in to Apple Developer, go to the tab Identifiers and click "+" to add a new one. Fill in the prefix and suffix, then remember to check the box for “Push Notifications.”

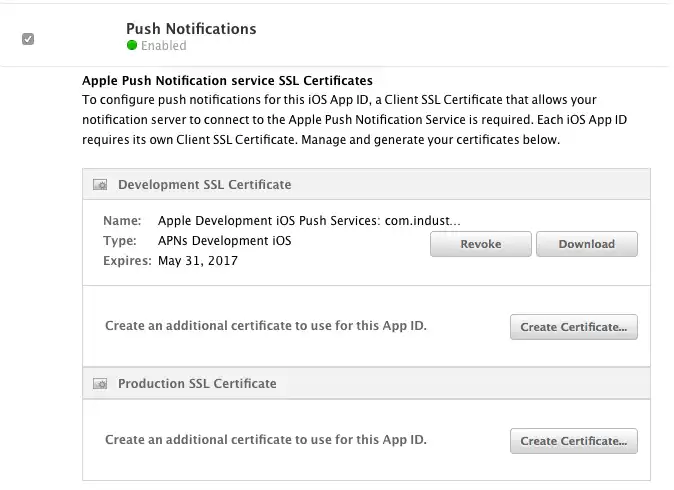
Next, select Edit and scroll to the Push Notifications section. Here, you'll see the “Configurable” orange indicators. Create and download the Development SSL certificate using your CSR file. Double-click to run it and add it to your keychain.
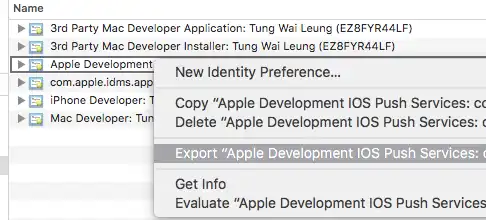
Open Keychain Access, find the certificate, and export it as a .p12 file. You'll be prompted to enter a password—don't leave it blank. Otherwise, the Java Spring app may not be able to parse an empty string. Save this file for later use.
2. Xcode Setup
Create a new Xcode project, such as a Single View Application. In the Capabilities tab, enable “Push Notifications” and log in with your Apple ID.

In AppDelegate.swift, add a method to create an instance of settings, which will prompt the user for permission when the app launches:
func registerForPushNotifications(application: UIApplication) {
  let notificationSettings = UIUserNotificationSettings(forTypes: [.Badge, .Sound, .Alert], categories: nil)
  application.registerUserNotificationSettings(notificationSettings)
}
Invoke this method when the application finishes launching:
func application(application: UIApplication, didFinishLaunchingWithOptions launchOptions: [NSObject: AnyObject]?) -> Bool {
  // Override point for customization after application launch.
  registerForPushNotifications(application)
  return true
}
In the same AppDelegate.swift file, add methods to handle the user's permission decision:
func application(application: UIApplication, didRegisterUserNotificationSettings notificationSettings: UIUserNotificationSettings) {
  if notificationSettings.types != .None {
    application.registerForRemoteNotifications()
  }
}
If the registration is successful, add:
func application(application: UIApplication, didRegisterForRemoteNotificationsWithDeviceToken deviceToken: NSData) {
  let tokenChars = UnsafePointer<CChar>(deviceToken.bytes)
  var tokenString = ""

  for i in 0..<deviceToken.length {
    tokenString += String(format: "%02.2hhx", arguments: [tokenChars[i]])
  }

  print("Device Token:", tokenString)
}
And for registration failure:
func application(application: UIApplication, didFailToRegisterForRemoteNotificationsWithError error: NSError) {
  print("Failed to register:", error)
}
To test, you'll need a physical device; a simulator won't work. If successful, you should see the device token in the console. Note this for later use.

3. Java Spring Server Setup
Create a Java Spring Framework server using your favorite IDE like NetBeans or IntelliJ. In this example, we are using a Maven build with a pom.xml file like this:
<!-- pom.xml content -->We will utilize the notnoop library from the Maven Repository. Add this dependency to your pom.xml:
<dependency>
  <groupId>com.notnoop.apns</groupId>
  <artifactId>apns</artifactId>
  <version>1.0.0.Beta6</version>
</dependency>
When the server starts, it will look for the main class, for example, PushNotificationApplication.java:
// PushNotificationApplication.java contentFor demonstration purposes, we will create a NotificationController.java:
// NotificationController.java contentReplace the placeholders in the code with your actual .p12 file path, password, and device token. If you're unsure about the file path, place the .p12 file at the same level as your /src folder, i.e., the root of the project folder.
Run the following commands to install and start the server:
mvn install
mvn spring-boot:run
Open your browser and navigate to http://localhost:8080/notification. You should receive a notification!

Feel free to reach out if you have any questions :)
Note: The content inside the code blocks (XML, Swift, and Java) was not changed. Make sure that the content is accurate and up-to-date.