Skip to content

2015

How to Upgrade Your Ghost Blog via Command Line

Step 1: Navigate to Your Ghost Blog Directory

First, change the directory to the path where your Ghost blog is installed. For example, in my case, it's located at:

cd /var/www

Step 2: Download the Latest Version with wget

Use wget to download the latest version of Ghost:

wget https://ghost.org/zip/ghost-X.X.X.zip

Note: You can find the current version on the official website: https://ghost.org/download/

Step 3: Remove the Old Core Code

Delete the old core directory:

rm -rf ghost/core

Step 4: Unzip the Downloaded File

Unzip the file you downloaded into the ghost directory:

unzip -uo ghost-0.6.4.zip -d ghost

Step 5: Change Ownership and Permissions

Update the ownership and permissions for the Ghost files:

chown -R ghost:ghost ghost/

Step 6: Install New Dependencies

Navigate back to your Ghost directory and install new dependencies:

cd /var/www/ghost
npm install

Step 7: Restart Ghost

Finally, restart your Ghost blog:

pm2 restart ghost

Note: If you're not using pm2, you can use the following command instead:

service ghost start

Your Ghost blog should now be successfully upgraded!


How to Upgrade Your Ghost Blog via Command Line

Welcome to "Continuous Improvement," the podcast where we explore tips, tricks, and strategies for improving and optimizing various aspects of our lives. I'm your host, Victor, and in today's episode, we're going to discuss how to upgrade your Ghost blog to the latest version. So if you're a Ghost blog owner and want to make sure you have all the latest features and bug fixes, this episode is for you.

Before we dive into the steps, make sure you have access to your Ghost blog directory. This is where all your Ghost files are stored. Once you're ready, let's get started!

Step 1 is to navigate to your Ghost blog directory. In your terminal, change the directory to the path where your Ghost blog is installed. For example, if your blog is located at /var/www, you can use the command:

cd /var/www

Great! Now that we're in the right directory, step 2 is to download the latest version of Ghost using the wget command. You can find the current version on the official Ghost website at https://ghost.org/download/. Once you have the download link, use wget followed by the link to download the latest version.

Awesome! Now that we have the latest version of Ghost downloaded, let's move on to step 3. In this step, we need to remove the old core code. Use the following command to delete the old core directory:

rm -rf ghost/core

We're making progress! Step 4 is all about unzipping the downloaded file into the Ghost directory. Use the command unzip -uo ghost-X.X.X.zip -d ghost, where X.X.X represents the version number you downloaded. This will extract the files and overwrite any existing ones.

Moving on to step 5, we need to update the ownership and permissions for the newly added Ghost files. This helps ensure everything works smoothly. Use the command chown -R ghost:ghost ghost/ to update the ownership.

Step 6 is an important one. We need to install new dependencies for the upgraded Ghost version. Navigate back to your Ghost directory using cd /var/www/ghost and run npm install to install the new dependencies.

Fantastic! We're almost there. In step 7, it's time to restart your Ghost blog to complete the upgrade process. Use the command pm2 restart ghost if you're using pm2. If not, you can try service ghost start instead.

And there you have it! Your Ghost blog should now be successfully upgraded to the latest version. Remember, keeping your blog up to date ensures you have access to all the latest features and bug fixes.

That brings us to the end of this episode of "Continuous Improvement." I hope you found these steps helpful in upgrading your Ghost blog. If you have any questions or suggestions for future episodes, feel free to reach out to me. Until next time, keep improving and optimizing!

如何透過命令行升級您的Ghost博客

步驟1:導航至您的Ghost博客目錄

首先,將目錄更改為您的Ghost博客安裝的路徑。例如,在我的情況下,它位於:

cd /var/www

步驟2:使用wget下載最新版本

使用wget下載Ghost的最新版本:

wget https://ghost.org/zip/ghost-X.X.X.zip

注意:您可以在官方網站上找到當前的版本:https://ghost.org/download/

步驟3:移除舊的核心代碼

刪除舊的核心目錄:

rm -rf ghost/core

步驟4:解壓下載的文件

將您下載的文件解壓縮到ghost目錄:

unzip -uo ghost-0.6.4.zip -d ghost

步驟5:變更所有權和權限

更新Ghost文件的所有權和權限:

chown -R ghost:ghost ghost/

步驟6:安裝新的依賴關係

返回到您的Ghost目錄並安裝新的依賴關係:

cd /var/www/ghost
npm install

步驟7:重新啟動Ghost

最後,重新啟動您的Ghost博客:

pm2 restart ghost

注意:如果您不使用pm2,則可以使用以下命令:

service ghost start

您的Ghost博客現在應該已成功升級!


SSH: How to Fix the 'Unprotected Private Key' Error

The Problem

When I downloaded the .pem file to SSH into my AWS instance, I encountered the following error:

WARNING: UNPROTECTED PRIVATE KEY FILE!

Permissions 0640 for 'blog.pem' are too open. It is required that your private key files are NOT accessible by others. This private key will be ignored. Bad permissions: ignore key: blog.pem Permission denied (publickey).

The Solution

To resolve this issue, run the following command in your terminal:

ssh -i xxx.pem root@52.74.3.53

Replace xxx.pem with the name of your .pem file.

This command will modify the permissions on the keys, making them readable only by you.

SSH: How to Fix the 'Unprotected Private Key' Error

The Problem

Hello, and welcome to "Continuous Improvement," the podcast where we explore tips, tricks, and solutions for everyday problems. I'm your host, Victor. In today's episode, we'll be discussing a common issue encountered when attempting to SSH into an AWS instance. We'll explore the error message and provide step-by-step instructions to resolve it. So let's dive right in!

Have you ever come across the following error message when trying to SSH into your AWS instance?

"WARNING: UNPROTECTED PRIVATE KEY FILE! Permissions 0640 for 'blog.pem' are too open. It is required that your private key files are NOT accessible by others. This private key will be ignored. Bad permissions: ignore key: blog.pem Permission denied (publickey)."

This error message may seem complex at first, but fear not! I have a simple solution for you. By following a few steps, we can quickly resolve this issue.

Step one, open your terminal, and navigate to the location of your .pem file.

Step two, once you're in the correct directory, run the following command:

"ssh -i xxx.pem root@52.74.3.53"

Make sure to replace xxx.pem with the name of your specific .pem file.

This command will modify the permissions on the keys, making them readable only by you. Once you've done that, you should be able to SSH into your AWS instance without any issues.

And just like that, you've successfully resolved the pesky permissions error that was preventing you from accessing your AWS instance. Remember, continuous improvement is all about finding solutions to everyday problems and making our lives easier.

I hope you found this episode helpful. If you have any questions or suggestions for future episodes, feel free to reach out. Thank you for tuning in to "Continuous Improvement." I'm your host, Victor, and until next time, keep learning, keep improving. Goodbye!

SSH:如何修復「未保護的私鑰」錯誤

問題

當我下載了 .pem 檔案以便 SSH 連線到我的 AWS 實例時,我遇到了以下的錯誤:

警告:未保護的私鑰檔案!

'blog.pem' 的權限 0640 過於開放。要求您的私鑰檔案不能被其他人訪問。將忽略此私鑰。壞的權限:忽略鑰匙:blog.pem 權限被拒絕 (publickey)。

解決方案

為了解決此問題,在你的終端機執行下列的指令:

ssh -i xxx.pem root@52.74.3.53

xxx.pem 換成你的 .pem 檔案的名稱。

此指令會修改鑰匙的權限,使其僅能被你閱讀。

How to Fix Ruby Gems Permission Error on Mac OS X Yosemite

The Problem

While trying to install a gem on Mac OS X Yosemite, I encountered the following error:

ERROR: While executing gem … (Gem::FilePermissionError) You don’t have write permissions for the /Library/Ruby/Gems/2.0.0 directory.

The Solution

Step 1: Install Rbenv

To start, you'll need to install Rbenv and Ruby-build:

brew install rbenv ruby-build

Next, add Rbenv to ~/.zshrc so it starts automatically:

echo 'export PATH="$HOME/.rbenv/bin:$PATH"' >> ~/.zshrc
echo 'eval "$(rbenv init -)"' >> ~/.zshrc

Note: If you are not using Zsh, modify your ~/.bash_profile instead of ~/.zshrc.

Step 2: Restart Your Shell

Close your terminal and reopen it to apply the changes.

Step 3: Install Ruby, Set Global Version, and Rehash

Now, install Ruby and set it as your global Ruby version:

rbenv install 2.0.0-p247
rbenv global 2.0.0-p247
rbenv rehash
Step 4: Install Gems as Usual

You can now proceed to install gems without encountering permission issues.

gem install [gem-name]

Your gem should now install successfully!


How to Fix Ruby Gems Permission Error on Mac OS X Yosemite

The Problem

Hello and welcome back to Continuous Improvement, the podcast where we explore solutions to common problems faced by developers. I'm your host, Victor, and in today's episode, we'll be discussing how to resolve a permission error when trying to install a gem on Mac OS X Yosemite.

So, you're trying to install a gem, but you come across the following error message: "ERROR: While executing gem … (Gem::FilePermissionError) You don’t have write permissions for the /Library/Ruby/Gems/2.0.0 directory." What can you do to fix this issue?

The solution involves a few steps, but don't worry, I'll guide you through them. Let's get started.

Step 1 is to install Rbenv and Ruby-build. Open your terminal and enter the following command: "brew install rbenv ruby-build". This will install the necessary tools.

Now, we need to add Rbenv to your configuration file so that it starts automatically. If you're using the Zsh shell, enter the following commands: "echo 'export PATH="$HOME/.rbenv/bin:$PATH"' >> ~/.zshrc" and "echo 'eval "$(rbenv init -)"' >> ~/.zshrc".

If you are using a different shell, such as Bash, modify your ~/.bash_profile with the same commands.

Step 2 requires you to restart your shell. Close your terminal completely and reopen it to apply the changes we made.

In Step 3, we'll install Ruby, set it as your global version, and rehash. Enter the following commands in your terminal: "rbenv install 2.0.0-p247" to install Ruby, "rbenv global 2.0.0-p247" to set it as the global version, and "rbenv rehash" to update the Ruby environment.

Great! Now we're ready for Step 4. You can now proceed to install gems without encountering any permission issues. Simply use the command "gem install [gem-name]" to install your desired gem.

And there you have it folks, a step-by-step guide to overcome the permission error when installing a gem on Mac OS X Yosemite. With these instructions, you'll be able to install gems hassle-free.

Well, that's all for today's episode of Continuous Improvement. I hope you found this information helpful. If you have any questions or suggestions for future episodes, feel free to reach out to me. Thank you for tuning in, and until next time, happy coding!

如何修復Mac OS X Yosemite上的Ruby Gems權限錯誤

問題

當我嘗試在Mac OS X Yosemite上安裝一個gem時,我遇到了以下錯誤:

錯誤:在執行gem時...(Gem::FilePermissionError)您沒有/Library/Ruby/Gems/2.0.0目錄的寫入權限。

解決方案

步驟1:安裝Rbenv

首先,您需要安裝Rbenv和Ruby-build:

brew install rbenv ruby-build

接下來,將Rbenv添加到~/.zshrc中,使其自動啟動:

echo 'export PATH="$HOME/.rbenv/bin:$PATH"' >> ~/.zshrc
echo 'eval "$(rbenv init -)"' >> ~/.zshrc

:如果您不使用Zsh,請修改您的~/.bash_profile,而不是~/.zshrc

步驟2:重新啟動你的Shell

關閉您的終端並重新打開它以應用更改。

步驟3:安裝Ruby,設置全局版本並重新排序

現在,安裝Ruby並將其設置為您的全局Ruby版本:

rbenv install 2.0.0-p247
rbenv global 2.0.0-p247
rbenv rehash
步驟4:像往常一樣安裝Gems

現在您可以繼續安裝gems,而不會遇到權限問題。

gem install [gem-name]

您的gem現在應該成功安裝了!


Survival Tips for Non-Korean Speakers in Busan and Vicinity

Aleumdaun! This is how Koreans describe something as "lovely." They often use this phrase to talk about the scenic beauty of Busan, Gyeongju, and Jinhae, particularly in the spring when cherry blossoms are in full bloom.

Who doesn't love traveling? Korea is an under-explored country where most visitors usually don't venture beyond Seoul. Each of us has our own travel priorities and preferences. Personally, I love spontaneous travel, as it provides a break from my regular work schedule. It’s exhilarating to put myself in unfamiliar situations, where I don’t know the language or even have internet on my iPhone. It’s a daring step out of my comfort zone.

Here are some survival tips for non-Korean speakers visiting Busan:

Make New Friends

While staying in a guesthouse instead of a hotel, I met a savvy businessman, a talented doctor, and a lovely ajumma (Korean auntie). Though my limited Korean skills make verbal communication challenging with those who don’t speak English, remember that two-thirds of human interaction is nonverbal. A friendly smile and a warm greeting are universal. I spent an entire afternoon conversing through pictures and gestures. Koreans have a knack for turning strangers into friends. They are not only polite but also some of the kindest people I’ve met. To stay connected, consider downloading the Kakao Talk app.

Get a High-Level Overview

Before exploring, get an overview of the city to avoid getting lost. Busan Tower, at 120 meters high, provides a splendid panorama. From its top deck, you'll get a 360-degree view of Busan, including the magnificent Gwangan Bridge.

Relax and Enjoy

Haeundae Beach is extraordinary, to say the least. The sight of the ocean will take your breath away. Nearby, you'll find attractions like Oryukdo Island, APEC Naru Park, and an aquarium. If you tire of walking, coffee shops like TwoSome Place, Tom n Tom, or Caffeine Gurunaru offer cozy retreats. Also, don't miss SpaLand Centum City, located in the world’s largest department store, Shinsegae. It’s the perfect place to unwind.

Keep an Open Mind

Busan's charm isn't just in its tourist spots; even a simple walk down the streets is captivating. From pig guts to pancakes, the city’s markets offer a unique blend of tradition and modernity. For delicious street food, head to the Busan International Film Festival (BIFF) square. If you’re a shopaholic, you’ll love the underground mall at Seomyeon and the bustling area near Nampo station. Also, the Jagalchi Fish Market is a must-visit for seafood lovers.

Learn About the Culture

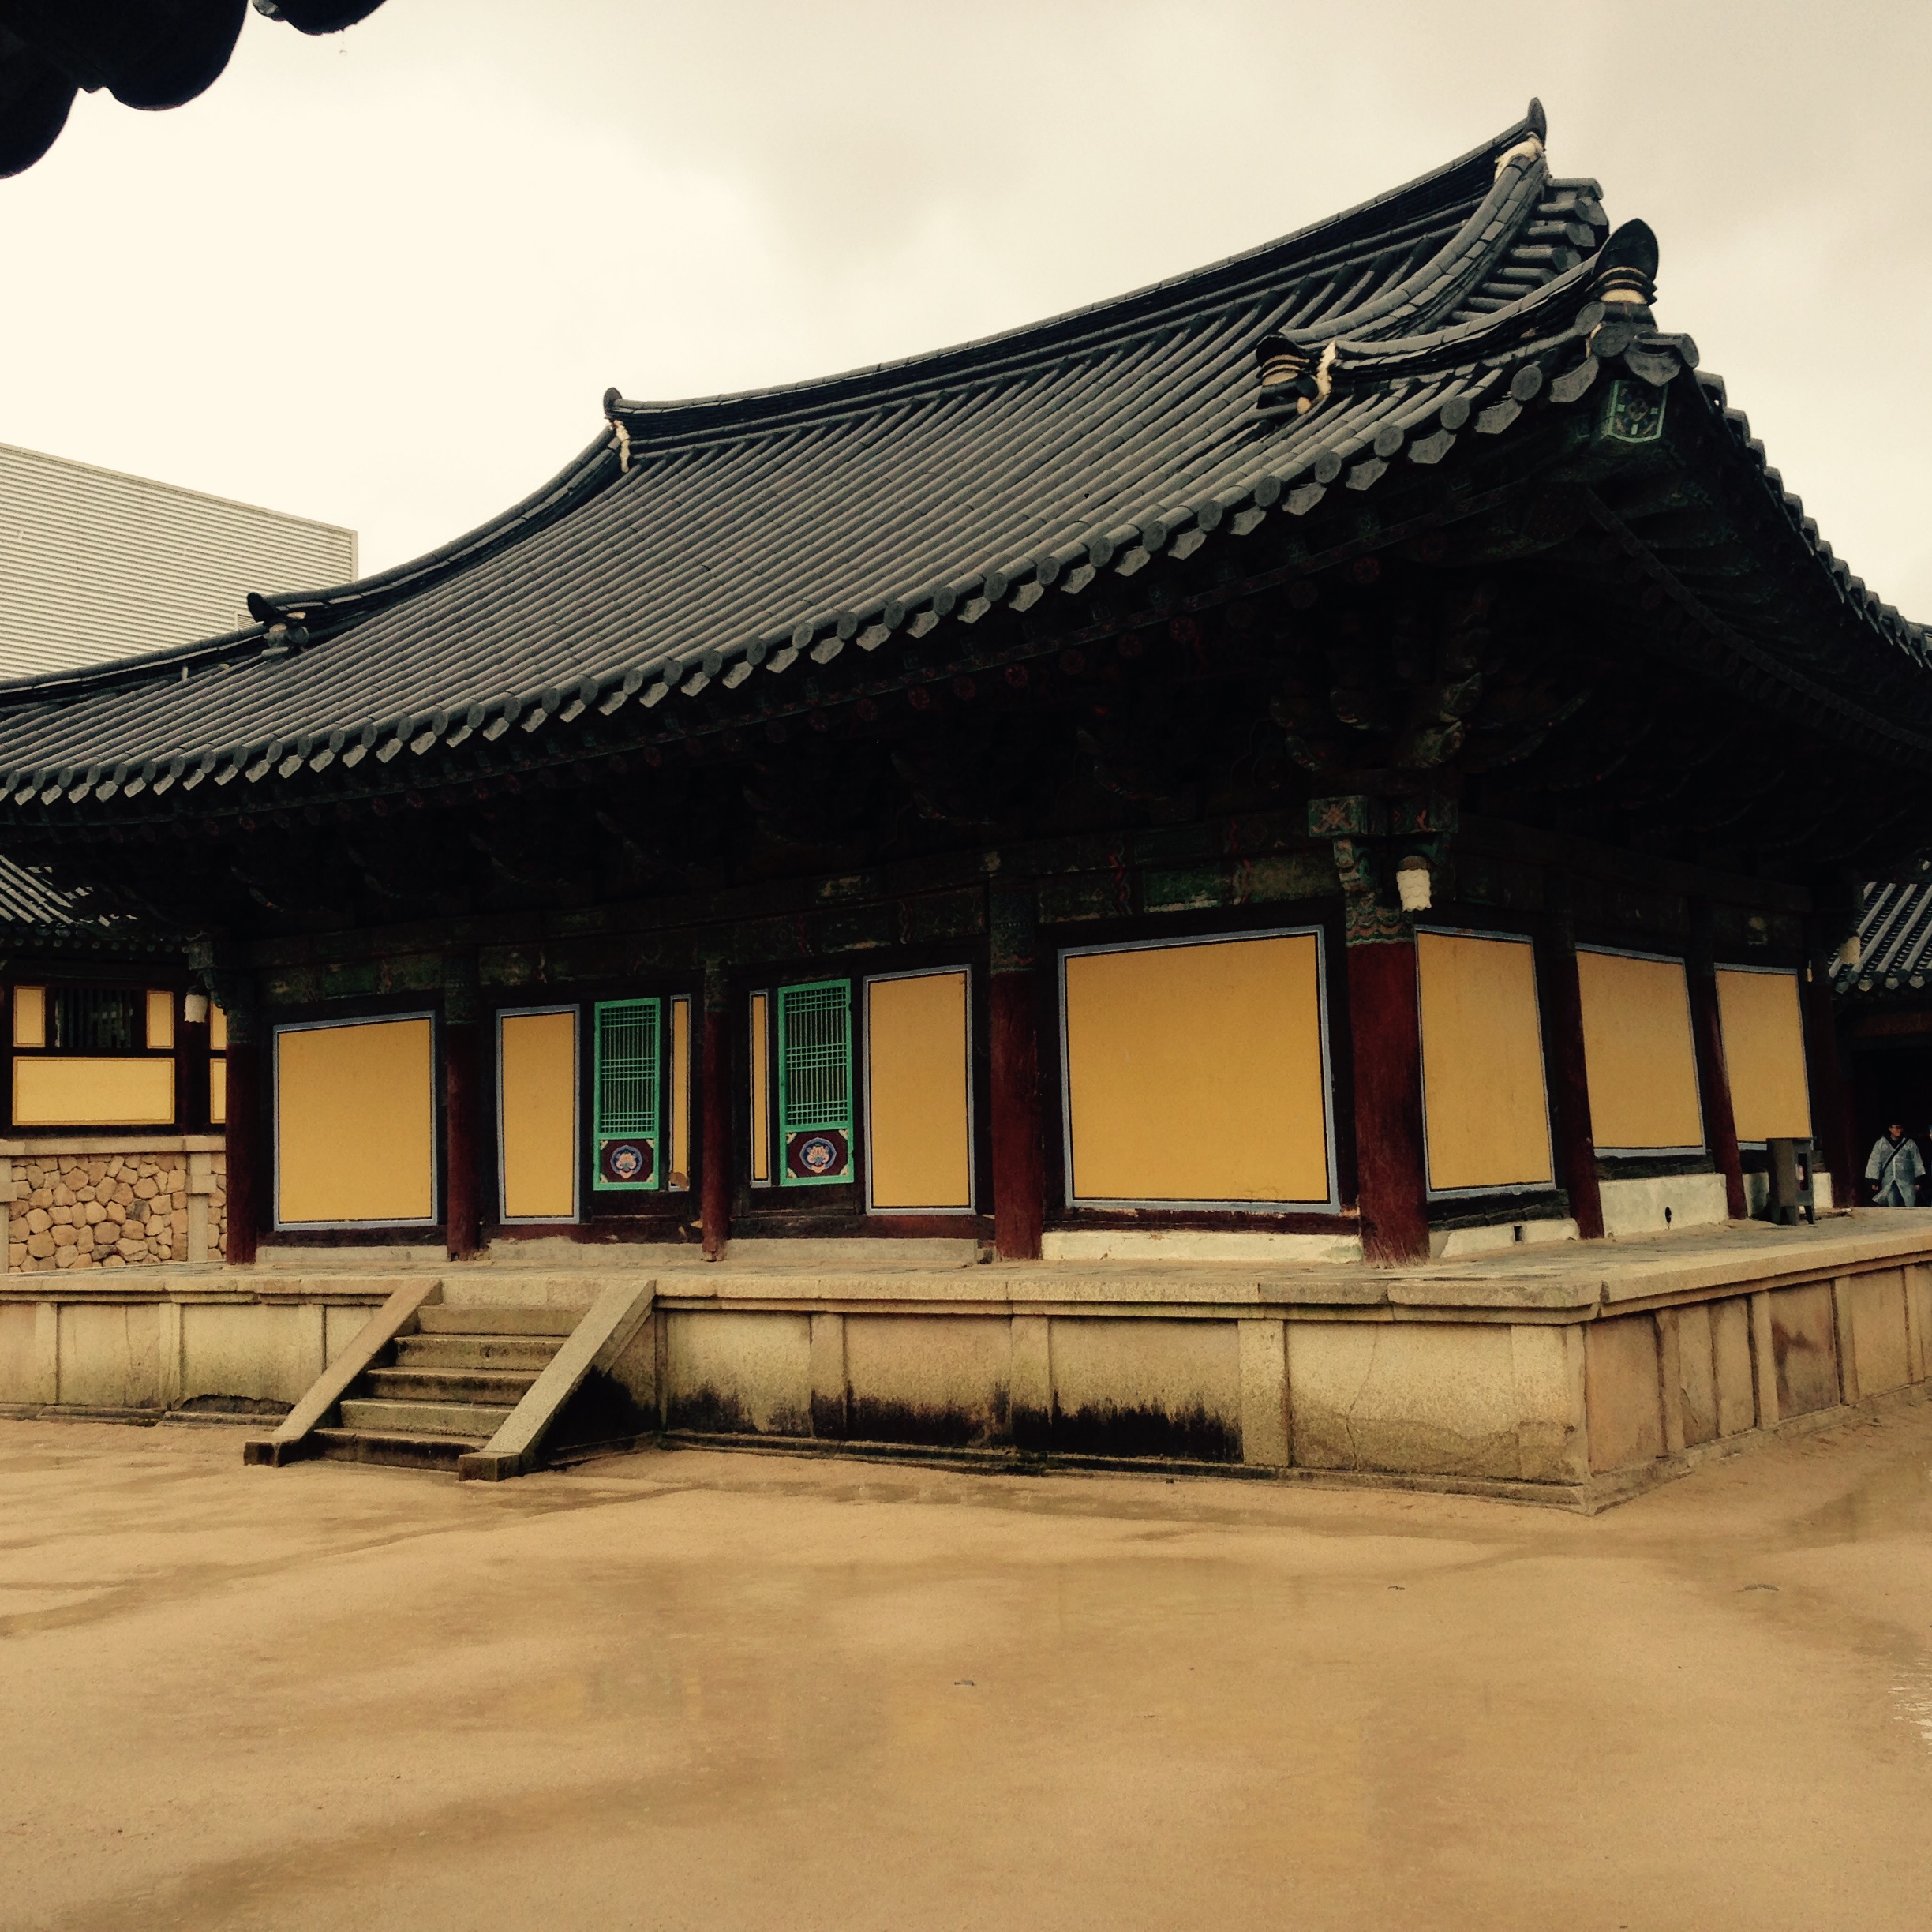
Gyeongju, located north of Busan, was the capital of the Silla dynasty for nearly a thousand years. It's a heritage site featuring grassy tombs of ancient royalty. Bulguksa Temple is often at the top of visitors' lists. It costs only 4,000 won for entry into this World Heritage site.
Enjoy Breathtaking Scenery

Every spring, Jinhae-gu, west of Busan, hosts a ten-day cherry blossom festival. The 1.5-kilometer long tunnels of flowers are a must-see. When a gust of wind makes the petals fall, it's a surreal and romantic scene.

So, grab your passport and join me on a trip to Busan for an exciting weekend getaway! Hopefully, this article inspires you to explore Korea and immerse yourself in its culture. To be honest, my body may have returned to the office, but my soul is still in Korea. Add me to your list of travel companions; I'm excited to discover more beautiful places and share them with you. Kamsa-Hamnida, which is the Korean way to say a heartfelt thank you.