Skip to content

2019

Installing Nextcloud on AWS EC2 with S3 Storage

In an effort to enhance my privacy, I've decided to minimize the use of Google products. I've replaced Chrome with Firefox, switched from Gmail to ProtonMail, and am now using Nextcloud instead of Google Drive. Nextcloud allows for self-hosting of cloud storage and provides control over my own data. Below are the steps to install Nextcloud on AWS EC2 and configure it to use S3 storage.

  1. Install Nextcloud using the Snap package manager:

bash sudo snap install nextcloud

  1. Create an admin user account:

bash sudo nextcloud.manual-install <admin_username> <admin_password>

  1. Add your trusted domain:

bash sudo nextcloud.occ config:system:set trusted_domains 1 --value=<your-domain>

  1. Using AWS Route 53, create an A record that points to the IP address of your Nextcloud server.

  2. Set up an SSL certificate with Let's Encrypt:

bash sudo nextcloud.enable-https lets-encrypt

  1. Navigate to your domain, and you should now be able to log in to your Nextcloud instance.

  1. Click on "Apps" and enable "Default encryption module" and "External storage support."

  2. Open AWS IAM (Identity and Access Management) and create a new user with programmatic access.

  3. Create a new policy using the JSON code below, replacing NAMEOFYOURBUCKET with the name of your S3 bucket. Attach this policy to the newly created user.

{
  "Version": "2012-10-17",
  "Statement": [
    {
      "Effect": "Allow",
      "Action": ["s3:GetBucketLocation", "s3:ListAllMyBuckets"],
      "Resource": "arn:aws:s3:::*"
    },
    {
      "Effect": "Allow",
      "Action": "s3:*",
      "Resource": [
        "arn:aws:s3:::NAMEOFYOURBUCKET",
        "arn:aws:s3:::NAMEOFYOURBUCKET/*"
      ]
    }
  ]
}
  1. In Nextcloud settings, select "External Storage." Fill in the "Bucket" field with NAMEOFYOURBUCKET. Check "Enable SSL" and "Enable Path Style," then fill in the required information using the credentials of the user you created.

  2. You're done! Navigate to your d3 folder, and you should now be able to upload files.

Installing Nextcloud on AWS EC2 with S3 Storage

Welcome to another episode of Continuous Improvement! I'm your host, Victor, and today we're diving into the world of privacy and data control. In a recent blog post, I shared my journey of minimizing the use of Google products and opting for alternatives that provide more control over our personal data. One of the key changes I made was switching from Google Drive to Nextcloud, a self-hosted cloud storage solution. So, if you're interested in learning how to install Nextcloud on AWS EC2 and configuring it to use S3 storage, you're in the right place! Let's get started.

The first step is to install Nextcloud, and to do that, we'll be using the Snap package manager. Open your terminal and enter the command: sudo snap install nextcloud. This will initiate the installation process. Once completed, move on to the next step.

Now that we have Nextcloud installed, let's create an admin user account. In your terminal, simply type: sudo nextcloud.manual-install, followed by your desired username and password. Make sure to remember these login credentials!

With our admin account set up, we need to add our trusted domain. This allows Nextcloud to verify incoming requests from a specific domain. In your terminal, execute the command: sudo nextcloud.occ config:system:set trusted_domains 1 --value=. Remember to replace with your actual domain.

Next, we need to create an A record on AWS Route 53 that points to the IP address of our Nextcloud server. This ensures that when we navigate to our domain, it will correctly link to our Nextcloud instance.

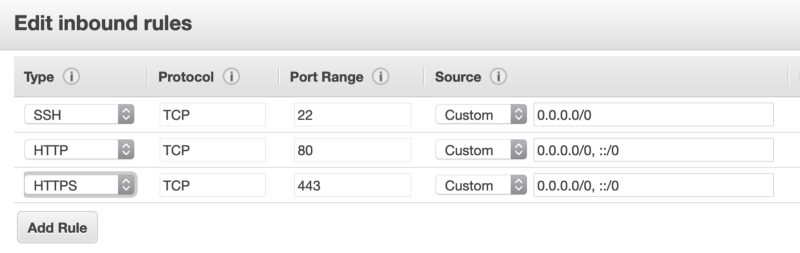
Security is important, so let's set up an SSL certificate with Let's Encrypt to enable secure communication between our Nextcloud server and clients. In your terminal, type: sudo nextcloud.enable-https lets-encrypt. This will initiate the SSL certificate creation process and ensure that your data remains encrypted.

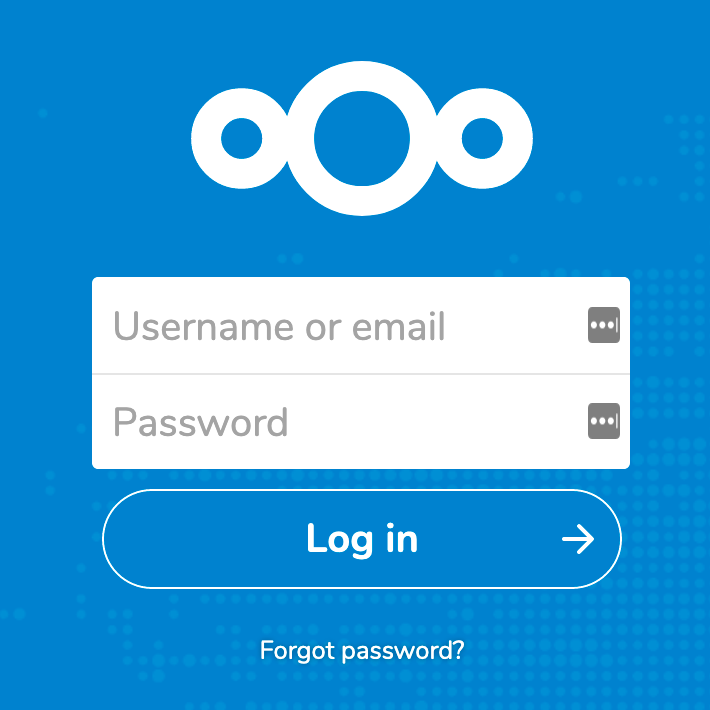
Now, it's time to put our setup to the test. Open your browser and navigate to your domain. You should now see the Nextcloud login page. Enter your admin username and password that we set up earlier, and voila! You're now logged in to your Nextcloud instance.

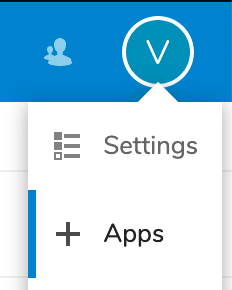
To enhance the functionality of Nextcloud, we can enable some useful apps. In your Nextcloud dashboard, click on "Apps" and enable both the "Default encryption module" and "External storage support." These additions will provide added security and allow us to integrate external storage options.

Speaking of external storage, let's set up Nextcloud to use S3 storage on AWS. We'll start by creating a new user with programmatic access in the AWS Identity and Access Management (IAM) console. This will generate a set of access keys that we'll need later.

After creating the user, it's time to define a policy that grants our Nextcloud instance access to the S3 bucket. In your IAM console, create a new policy using the provided JSON code in our blog post. Replace NAMEOFYOURBUCKET with the name of your S3 bucket and attach this policy to the newly created user.

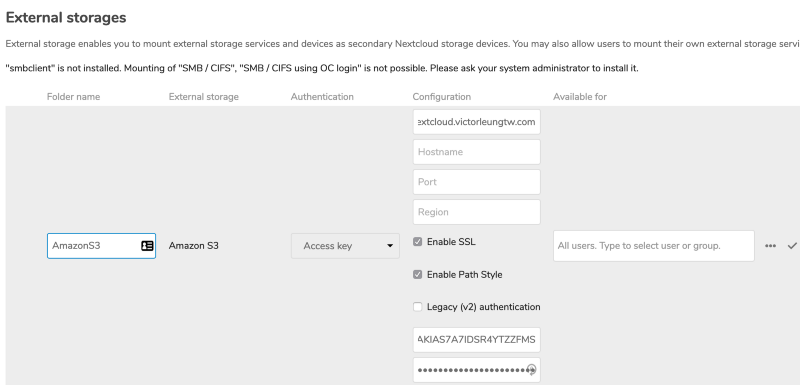
Now that our AWS setup is complete, let's configure Nextcloud to connect with our S3 storage. In the Nextcloud settings, select "External Storage." Fill in the "Bucket" field with NAMEOFYOURBUCKET. Check "Enable SSL" and "Enable Path Style," and enter the required information using the access keys of the user we created earlier.

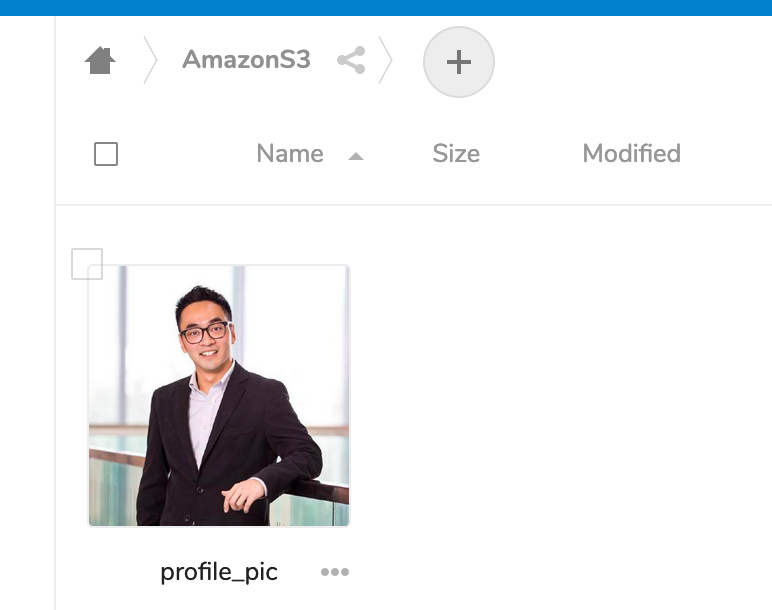
And that's it! You've successfully installed Nextcloud on AWS EC2 and configured it to use S3 storage. You can now navigate to your designated folder and start uploading files securely. Enjoy the control and peace of mind that Nextcloud brings to your personal data management.

Thank you for tuning in to this episode of Continuous Improvement. I hope you found the information helpful and empowering. If you enjoyed this podcast, please subscribe and leave us a review. And remember, continuous improvement is the key to unlocking our full potential. Until next time!

在AWS EC2上安裝Nextcloud,並使用S3儲存空間

為了提高我的隱私,我決定減少使用Google產品。我用Firefox取代了Chrome,從Gmail轉到ProtonMail,現在正在使用Nextcloud而非Google Drive。Nextcloud允許自託管雲存儲並對我的數據進行控制。以下是在AWS EC2上安裝Nextcloud並配置它以使用S3存儲的步驟。

  1. 使用Snap套件管理器安裝Nextcloud:

bash sudo snap install nextcloud

  1. 創建一個管理員用戶賬號:

bash sudo nextcloud.manual-install <admin_username> <admin_password>

  1. 添加你的信任域:

bash sudo nextcloud.occ config:system:set trusted_domains 1 --value=<your-domain>

  1. 使用AWS Route 53,創建一個指向您的Nextcloud服務器的IP地址的A記錄。

  2. 設置Let's Encrypt的SSL證書:

bash sudo nextcloud.enable-https lets-encrypt

  1. 導航到您的域名,您現在應該能夠登錄到您的Nextcloud實例。

  1. 點擊“Apps”並啟用“Default encryption module”和“External storage support”。

  2. 打開AWS IAM(Identity and Access Management)並創建一個具有程序化訪問的新用戶。

  3. 使用下面的JSON代碼創建一個新的策略,將NAMEOFYOURBUCKET替換為您的S3桶的名稱。將此策略附加到新創建的用戶。

{
  "Version": "2012-10-17",
  "Statement": [
    {
      "Effect": "Allow",
      "Action": ["s3:GetBucketLocation", "s3:ListAllMyBuckets"],
      "Resource": "arn:aws:s3:::*"
    },
    {
      "Effect": "Allow",
      "Action": "s3:*",
      "Resource": [
        "arn:aws:s3:::NAMEOFYOURBUCKET",
        "arn:aws:s3:::NAMEOFYOURBUCKET/*"
      ]
    }
  ]
}
  1. 在Nextcloud設置中,選擇“External Storage”。在“Bucket”字段中填入NAMEOFYOURBUCKET。選中“Enable SSL”和“Enable Path Style”,然後使用您創建的用戶的憑證填入所需的信息。

  2. 你已經完成了!導航到你的d3文件夾,你現在應該能夠上傳文件了。

Debugging PHP Code in the Browser

In JavaScript, you can use console.log('whatever') for troubleshooting directly in your browser. However, when working with PHP, a little trick is required to accomplish the same thing. Here are the steps:

  1. Create a function named debug_to_console to handle the output to the console. Add this code to your PHP file:

```php function debug_to_console($data) { $output = $data; if (is_array($output)) { $output = implode(',', $output); }

   echo "<script>console.log('Debug Objects: " . $output . "');</script>";

} ```

  1. On the line where you need to output to the console, insert the following code:

php debug_to_console("Test");

  1. If you need to debug an object, you can log it like this:

php debug_to_console(json_encode($foo));

After following these steps, open your browser's developer tools. You should be able to see the PHP object displayed in the console using console.log.

Debugging PHP Code in the Browser

Welcome to "Continuous Improvement," the podcast where we explore different techniques and strategies for continuously improving our coding skills. I'm your host, Victor, and in today's episode, we'll be diving into a helpful trick for outputting to the console in PHP.

Hey there, fellow developers! Have you ever found yourself in a troubleshooting situation when working with PHP? You know, that moment where you just wished you could use a simple console.log like in JavaScript. Well, today I have a neat little trick to share with you.

In JavaScript, debugging directly in the browser console is a breeze. But when it comes to PHP, things can get a bit tricky. However, fear not! With this technique, you'll be able to accomplish the same thing. So, let's dive into the steps.

Step one, create a function named debug_to_console. This function will handle the output to the console. You can add the following code to your PHP file:

function debug_to_console($data) {
    $output = $data;
    if (is_array($output)) {
        $output = implode(',', $output);
    }

    echo "<script>console.log('Debug Objects: " . $output . "');</script>";
}

Step two, when you need to output something to the console, insert the following code:

debug_to_console("Test");

And voila! You should see the desired output in your browser's developer tools console.

But wait, there's more. Step three allows you to go even further by debugging objects logged as JSON strings. Here's how you can do it:

debug_to_console(json_encode($foo));

By encoding the object as a JSON string, you can easily log complex objects and analyze their contents in the console.

And there you have it! A nifty little trick to output to the console while working with PHP. Remember, continuous improvement is key to becoming a better developer.

That's all for today's episode of "Continuous Improvement." I hope you found this PHP console logging technique helpful. Stay tuned for more coding tips and tricks in our future episodes.

If you have any suggestions for topics you'd like us to cover or any questions you'd like me to answer, feel free to reach out on our website, continuousimprovement.com. Keep coding and keep improving!

在瀏覽器中調試PHP代碼

在JavaScript中,你可以直接在瀏覽器中使用console.log('whatever')進行故障排查。然而,當使用PHP時,需要一些小技巧才能達到同樣的效果。以下是操作步驟:

  1. 創建一個名為debug_to_console的函數來處理輸出到控制台的內容。將此代碼添加到你的PHP文件中:

```php function debug_to_console($data) { $output = $data; if (is_array($output)) { $output = implode(',', $output); }

   echo "<script>console.log('Debug Objects: " . $output . "');</script>";

} ```

  1. 在你需要輸出到控制台的行處,插入以下程式碼:

php debug_to_console("Test");

  1. 如果你需要偵錯一個物件,您可以這樣記錄它:

php debug_to_console(json_encode($foo));

按照這些步驟操作後,打開你的瀏覽器的開發者工具。您應該能夠看到在控制台使用console.log顯示的PHP物件。

Installing Ubuntu 19.10 on a MacBook Pro 13,1

I became frustrated with macOS Catalina and decided to switch to Ubuntu as the primary operating system on my 13-inch MacBook Pro without a touch bar. As a software developer, I found that macOS bundles many tools with Xcode, which takes up to 10GB of disk space. While disk space wasn't my primary concern, sometimes the network can be slow for downloads, and updates can get stuck. Losing an hour to such issues is an unnecessary obstacle when trying to get work done.

I was initially concerned about whether the proprietary hardware would be compatible with an open-source Linux distribution. To my surprise, many features work right out of the box with a fresh install, thanks to the community's efforts. This includes the screen, keyboard, touchpad, and Wi-Fi. The only feature that doesn't work is the audio, but this can be circumvented using my USB Type-C headphones or an HDMI external monitor with speakers. This GitHub page offers excellent documentation on the compatibility of different MacBook hardware with Linux: MacBook Hardware Support on Linux.

If you're interested in trying Ubuntu on your MacBook Pro, here are the simple steps to follow:

  1. Download Ubuntu 19.10 from the official Ubuntu site.
  2. Create a bootable USB stick using Etcher by following the steps in this guide: Create a USB Stick on macOS.
  3. Restart your MacBook and press the Option key to select the USB stick as the boot device.
  4. Try Ubuntu and proceed with installation if it suits you.

That's it! As a developer, you can quickly set up essential tools like Git by running sudo apt install git. This is more straightforward than on macOS, which restricts your freedom in various ways. It's good not to become too comfortable with a single platform, as you can't always trust big corporations to act in your best interest—such as protecting your personal data from government surveillance. Embrace the open-source community and appreciate the freedom to choose an alternative operating system.

P.S. 1: To get Bluetooth working, run the script found in this repository:

MacBook Bluetooth Driver

P.S. 2: To get the camera working, install the driver by following this guide:

Camera Driver Guide

Installing Ubuntu 19.10 on a MacBook Pro 13,1

Welcome to Continuous Improvement, the podcast where we explore ways to make our lives better, one step at a time. I'm your host, Victor, and today we're going to talk about a topic that might interest our fellow software developers out there. Have you ever found yourself frustrated with a particular operating system? Well, I certainly have, and today I want to share with you my journey from macOS to Ubuntu on my MacBook Pro.

As a software developer, having the right tools and environment to work in is essential. But sometimes, the operating system you're using can prove to be a roadblock to your productivity. That's when I decided to explore an alternative, and after some research, I found that Ubuntu could be the answer.

One of the reasons I wanted to switch from macOS Catalina to Ubuntu was the amount of disk space that Xcode and its bundled tools were taking up. Up to 10GB of disk space just for one software package! As a developer, I couldn't afford to waste precious time waiting for slow downloads and updates to finish.

Now, the first concern that popped into my mind was whether my MacBook Pro hardware would be compatible with an open-source Linux distribution like Ubuntu. But to my surprise, thanks to the efforts of the community, many features worked right out of the box with a fresh Ubuntu install. The screen, keyboard, touchpad, and Wi-Fi all worked seamlessly. The only feature that required a workaround was audio, which I managed to solve by using USB Type-C headphones or connecting to an external monitor with built-in speakers.

If you're curious about trying Ubuntu on your MacBook Pro, the process is actually quite simple. First, you'll need to download Ubuntu 19.10 from the official Ubuntu website. Once you have the ISO file, you'll create a bootable USB stick using a tool called Etcher. There's a helpful guide available on the Ubuntu website that will walk you through this step-by-step. After that, restart your MacBook, press the Option key, and select the USB stick as the boot device. From there, you can try Ubuntu and proceed with the installation if it suits your needs.

As a developer, I found that setting up essential tools like Git on Ubuntu was a breeze. With a simple command, you can install Git and start using it right away. This is a much more straightforward process compared to macOS, which can restrict your freedom in various ways.

It's important not to become too comfortable with a single platform. By exploring alternative operating systems like Ubuntu, you can embrace the open-source community and experience the freedom of choice. At times, big corporations may not always act in our best interest when it comes to protecting our personal data from government surveillance. That's where open-source software shines, giving us the opportunity to take control of our own digital lives.

Before we wrap up, I want to share a couple of additional resources if you decide to make the switch to Ubuntu on your MacBook Pro. If you want to get Bluetooth working, there's a handy script available on GitHub that you can use. And if you're also looking to get your camera working, there's a detailed guide available to help you install the necessary driver.

Well, that's all for today's episode of Continuous Improvement. I hope that this discussion on transitioning from macOS to Ubuntu has given you some valuable insights. Remember, don't be afraid to explore alternatives and continuously improve your work environment. Stay tuned for our next episode, where we'll tackle another exciting topic. Until then, keep striving for continuous improvement in all aspects of your life.

在 MacBook Pro 13,1 上安裝 Ubuntu 19.10

我對 macOS Catalina 感到挫折,因此決定將 Ubuntu 設為我 13 英寸的 MacBook Pro(不帶觸控條)的主要操作系統。作為一名軟件開發者,我發現 macOS 會與 Xcode 一同打包許多工具,這將佔用多達10GB的磁碟空間。雖然磁碟空間並非我主要的憂慮,但有時候網路下載的速度會很慢,而更新也可能會卡住。在試圖完成工作時流失一小時是不必要的障礙。

我起初擔心專有硬體是否能與開源的 Linux 分佈版兼容。令我驚訝的是,許多功能在初次安裝後就可以立即使用,感謝社區的努力。這包括了螢幕、鍵盤、觸控板,以及 Wi-Fi。唯一不適用的功能是音訊,但我可以使用我的 USB Type-C 耳機或帶有喇叭的 HDMI 外接顯示器來解決這個問題。這個 GitHub 頁面提供了關於各種 MacBook 硬體與 Linux 兼容性的詳細文檔:MacBook 在 Linux 上的硬體支援

如果你對在 MacBook Pro 上試用 Ubuntu 感興趣,請按照以下幾個簡單的步驟操作:

  1. Ubuntu 官方網站 下載 Ubuntu 19.10。
  2. 按照此指南的步驟,使用 Etcher 製作可開機的 USB 隨身碟:在 macOS 上製作 USB 隨身碟
  3. 重新啟動你的 MacBook,並按下 Option 鍵,選擇 USB 隨身碟作為開機設備。
  4. 嘗試使用 Ubuntu,如果你覺得合適,就繼續進行安裝。

就是這樣!作為開發者,你可以透過執行 sudo apt install git 來快速設定這類必要工具。這比在 macOS 上更簡單,macOS會以各種方式來限制你的自由。不應該對任何一個平台過於依賴,因為不能一直相信大公司會為了你的最佳利益行事,例如保護你的個人資料不受政府監視。擁抱開源社區,欣賞選擇替代操作系統的自由。

附註 1: 若要讓藍牙運作,請在這個儲存庫中執行找到的腳本:

MacBook 藍牙驅動

附註 2: 若要讓相機運作,請按照這份指南來安裝驅動:

相機驅動指南

Setting Up MongoDB with Koa.js

I'm building a Koa.js server and need to connect it to MongoDB to store and retrieve data. Here's how to accomplish this in a few simple steps:

Step 1: Connect to the Database Before Initializing the Koa App

const initDB = require("./database")

initDB()

const app = new Koa()

Inside database.js, import mongoose. Make sure to install mongoose using npm install --save mongoose as well. Mongoose is an Object Data Modeling (ODM) library.

const mongoose = require("mongoose")
import { connectionString } from "./conf/app-config"

const initDB = () => {
  mongoose.connect(connectionString)

  mongoose.connection.once("open", () => {
    console.log("Connected to the database")
  })

  mongoose.connection.on("error", console.error)
}

module.exports = initDB

Next, create the configuration for your connection string:

export const connectionString =
  "mongodb+srv://" +
  secret.mongodb.username +
  ":" +
  secret.mongodb.password +
  "@xxxxxx.mongodb.net/test?retryWrites=true&w=majority"

You can either run a local MongoDB instance or use MongoDB Atlas and host it on AWS cloud. You'll find the connection string to include in your config file there.

Step 2: Create a Schema in Koa

For instance, let's create a user schema inside /models/users.js.

const mongoose = require("mongoose")
const Schema = mongoose.Schema

const UserSchema = new Schema({
  username: String,
  email: String,
  picture: String,
})

module.exports = mongoose.model("User", UserSchema)

Step 3: Create a Service to Query the Data

Let's say we have a /service/user.service.js.

import User from "../models/users"

export const getUserFromDb = async username => {
  const data = await User.findOne({ username })
  return data
}

export const createUserInDb = async user => {
  const newUser = new User(user)
  await newUser.save()
  return user
}

Step 4: Call the Service in the Koa Controller

For instance, let's say we have a /controller/user.controller.js.

    import { getUserFromDb, createUserInDb } from '../service/user.service';

    static async getUser(ctx) {
      const user = await getUserFromDb(ctx.query.username);
      ctx.body = user;
    }

    static async registerUser(ctx) {
      const user = await createUserInDb(ctx.request.body);
      ctx.body = user;
    }

Finally, you can register the route using the controller. Now you should be able to see the data being stored in the database. Feel free to reach out if you have any questions.