In an effort to enhance my privacy, I've decided to minimize the use of Google products. I've replaced Chrome with Firefox, switched from Gmail to ProtonMail, and am now using Nextcloud instead of Google Drive. Nextcloud allows for self-hosting of cloud storage and provides control over my own data. Below are the steps to install Nextcloud on AWS EC2 and configure it to use S3 storage.
-
Install Nextcloud using the Snap package manager:
sudo snap install nextcloud -
Create an admin user account:
sudo nextcloud.manual-install <admin_username> <admin_password> -
Add your trusted domain:
sudo nextcloud.occ config:system:set trusted_domains 1 --value=<your-domain> -
Using AWS Route 53, create an A record that points to the IP address of your Nextcloud server.
-
Set up an SSL certificate with Let's Encrypt:
sudo nextcloud.enable-https lets-encrypt
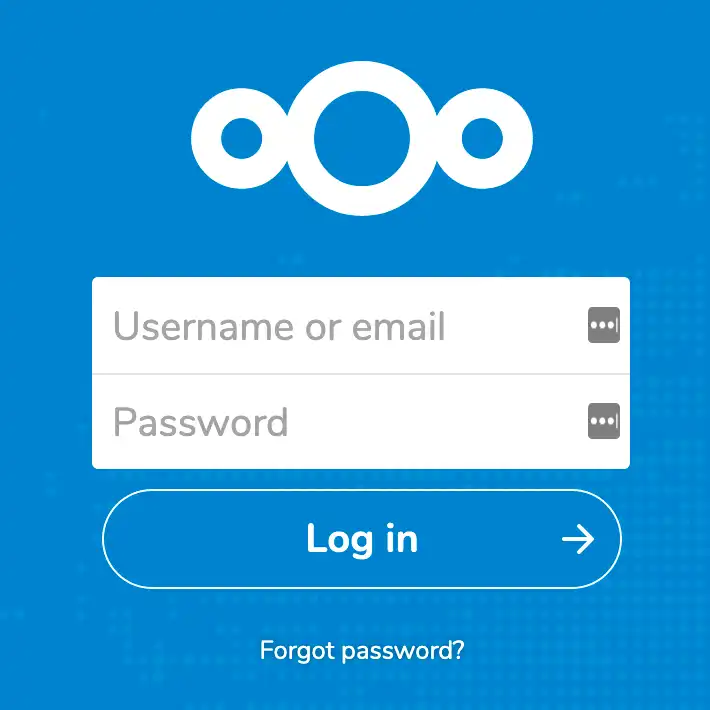
- Navigate to your domain, and you should now be able to log in to your Nextcloud instance.

-
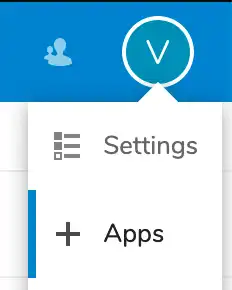
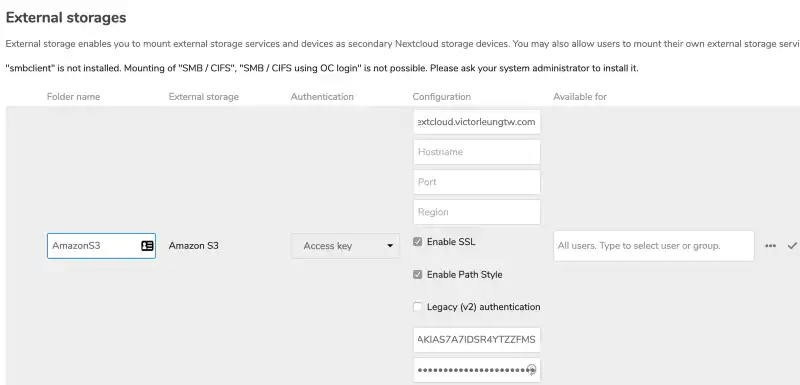
Click on "Apps" and enable "Default encryption module" and "External storage support."
-
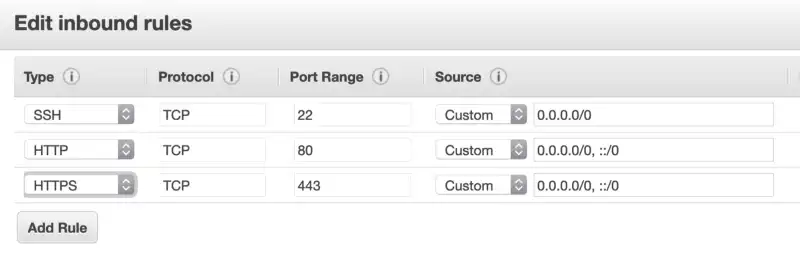
Open AWS IAM (Identity and Access Management) and create a new user with programmatic access.
-
Create a new policy using the JSON code below, replacing
NAMEOFYOURBUCKETwith the name of your S3 bucket. Attach this policy to the newly created user.
{
  "Version": "2012-10-17",
  "Statement": [
    {
      "Effect": "Allow",
      "Action": ["s3:GetBucketLocation", "s3:ListAllMyBuckets"],
      "Resource": "arn:aws:s3:::*"
    },
    {
      "Effect": "Allow",
      "Action": "s3:*",
      "Resource": [
        "arn:aws:s3:::NAMEOFYOURBUCKET",
        "arn:aws:s3:::NAMEOFYOURBUCKET/*"
      ]
    }
  ]
}-
In Nextcloud settings, select "External Storage." Fill in the "Bucket" field with
NAMEOFYOURBUCKET. Check "Enable SSL" and "Enable Path Style," then fill in the required information using the credentials of the user you created. -
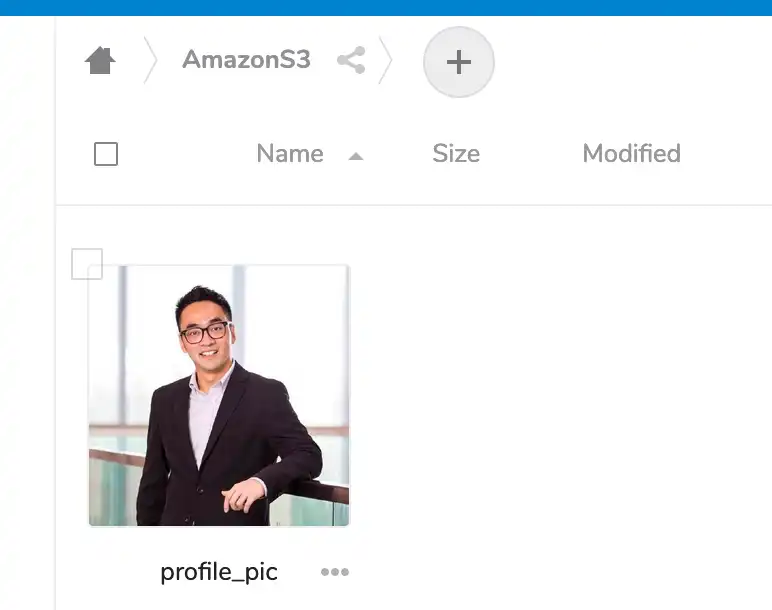
You're done! Navigate to your
d3folder, and you should now be able to upload files.